On several occasions I have presented topics to my team during our monthly lunch and learns. These presentations almost always include code samples and complaints about font size. Although I had read, I have never taken Scott Hanselman’s advice for preparing for a screencast. Most of which are applicable when presenting.
“Use the standard Visual Studio Font Colors… change your fonts to Consolas Size 15.”
Oh no! I haven’t used the default Visual Studio theme since I ran across Rob Conery’s Vibrant Ink theme (which should be shipped as the defaults IMHO). It would be nice if Visual Studio made it simple to switch between various configurations on the fly.
Then last week I saw this tweet come through my feed.
That’s it. I decided that today was the day for change. Jeff Handley’s macros make it dead simple to go from development to presentation mode on the fly.
There are just a few things that I wanted to tweak. First, I found switching to presentation mode took too long, and I thought it would be simpler to just change the font size. Second, I wanted to be able to switch between the default theme and my theme quickly and without affecting font size.
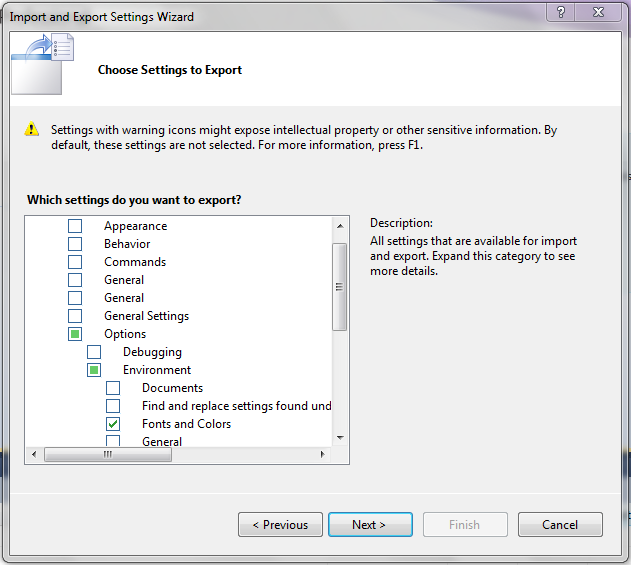
With this in mind, I needed to export the default Visual Studio colors and the Vibrant Ink themes. To make switching themes short, I only exported Options > Environment > Fonts and Colors.

Next, I launched Tools > Macros > Macros IDE… and got to work. Using Jeff’s macros as the base I started making my changes. So instead of loading settings for presentations, I made the macro toggle the font size between 10 and 15. When applying a change to the theme I made sure to remember the current font size and set it back after loading either the default theme or my own. Although I struggled a bit with the Visual Basic syntax, it wasn’t long until I was finished.
Below is the modified Settings macros that I use.
1 2 3 4 5 6 7 8 9 10 11 12 13 14 15 16 17 18 19 20 21 22 23 24 25 26 27 28 29 30 31 32 33 34 35 36 37 38 39 40 41 42 43 44 45 46 47 48 49 50 51 52 53 54 55 56 57 58 59 60 61 62 63 64 65 66 | |
At this point, I threw together a toolbar and added the macros to it. They worked! Now I wanted to create some nice icons to use just like Jeff had done. It was when I was trying to apply them that disappointment crept in. Despite the documentation for adding macros to a toolbar, the comments point out correctly that you cannot assign a macro command an image. Bummer.
Maybe I don’t need a toolbar. I can just hook up the macros to some easy to remember shortcut chords. Click on Tools > Options… menu. Then browse to Environment > Keyboard. Type Macros.Settings into the filter box and we can start assigning.

Finding shortcut keys that weren’t already in use was a little frustrating, so I decided to go with “long, but simple to remember”. Using ctrl+alt+shift as the modifiers, my chords are s (for settings) then a, c, d, k, or p depending on which macro to launch.
Now I have no more excuses to use tiny code during my next presentation and if you follow these steps then neither will you. You can download my all of my vssettings, the macro file, and even the toolbar images I didn’t get to use here.
This post originally appeared on The DevStop.
